Getting Started
Steps
- Invite Niles to your server
- Google Calendar Authentication
- Add Google Calendar to your Niles Configuration
- Configure Timezone
- Run your calendar for the first time!
- Customise it
- Warnings
Invite Niles to your server
Google Calendar Authentication
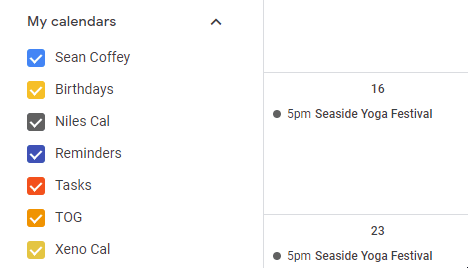
Public Calendars
Public Calendars do not need to be added to the calendar, they can be directly added to Niles with !id but events cannot be added or deleted without permission to make changes to events.
Differences between Service Account and OAuth2
Summary:
OAuth2
- Acts on your behalf, with access to all of your calendars
Service Accounts
- Acts as itself, with access to specified calendars
- Can no longer receive shared calendars
Service Accounts
- Allows per-calendar permissions
- Allow read-only or read-write permissions
- Extremely prone to errors or limited by Google (As of Jan 17, 2021)
- Events created by Service Account (Niles)
OAuth2
- Only allows permissions for ALL calendars for authorized accounts Reference
- Expires and invalidated if not used for 6 months
- Does not require ownership or share permissions on calendars
- Events created by (Person)
Adding via Service Account
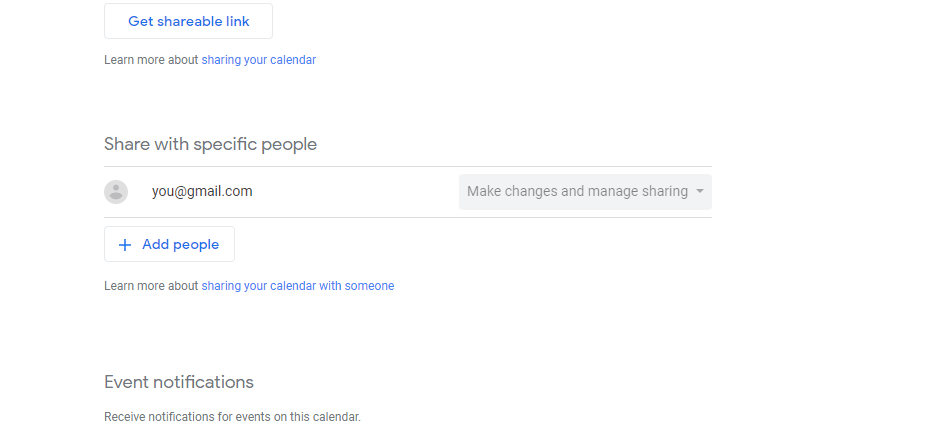
Select or create a Google Calendar, and select ‘Settings and sharing’
Scroll down and under ‘Share with specific people’, add [email protected] and give permissions to Make changes to events
Warning
The only way to add Niles to your Google Calendar is through acl.insert. You can try it at Google API Explorer This method is tested, but unsupported and may break at any time without notice.
Adding via Oauth2
If you have OAuth2 credentials installed, run !auth oauth2 and follow the link to authorize Niles to access your calendars.
Add Google Calendar to your Niles Configuration
Still on the ‘Settings and sharing’ page, scroll down to ‘Integrate Calendar’ and copy the calendar ID.

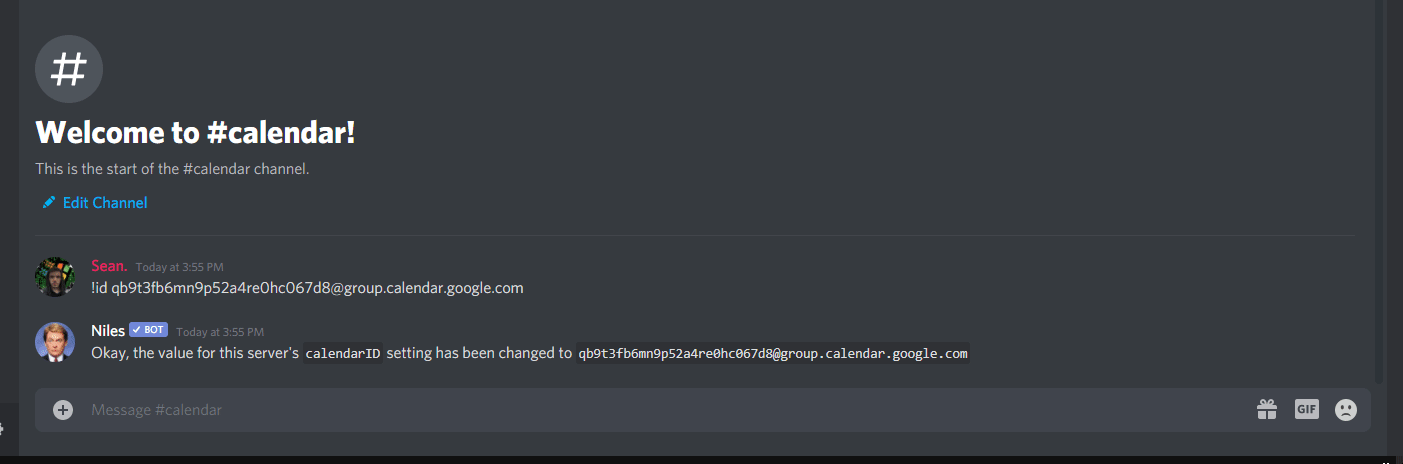
Now in your Discord server (in a channel where Niles will have permissions, i.e. #general or another channel you have setup) we can use !id with the usage !id calendarID i.e:
Configure Timezone
We could pull this from your Google calendar or Discord server, but since your members might be in different timezones, you must add your own.
This can be done using !tz i.e.
America/New_York
canada/eastern
Montreal
eastern
UTC+5
EST
This is done with timezone-soft
Demo
Run your calendar for the first time!
Great now we can tell Niles to pull events from our GCal, setting up the database and display our calendar.
!display - Displays the calendar WITHOUT deleting any messages.
Both methods pin the current calendar to the channel it was called in.
The calendar will automatically check for updates every 5 minutes, but you can manually use !update to pull any updates.
Customise it
You can change the way Niles looks and behaves, depending on your needs. See the detailed customisation documentation.
Warnings
GSuite/Workplace
If Niles is unable to find your calendar and you are under a GSuite / Google Workplace account, it’s possible that the administrator has limited external sharing.
Google has a help article on how to enable external sharing
https://support.google.com/a/answer/60765?hl=en
New Calendar Format
Google Calendar has a new format for calendar IDs
eg. [email protected]
If your calendar isn’t found, remove the CAL1_ portion - everything before and including the underscore